increase arm size sewing pattern
Now follow the alteration steps above but making sure that the centre gap you leave still accommodates the extra upper arm width you need so in my case two inches. Resize a sewing pattern to make it bigger or smaller.

Making Your Sleeves Fit
If you have a D cup or larger you will need a full bust adjustment or FBA.

. In the drawing given below the measurement A-B taken on the body and then is marked from the shoulder- neck joining point. Keep moving the pieces until your gap is as wide as your adjustment amount. After youve spread in the amount you need pin the bottom portion of the sleeve in place so that it doesnt move.
Now remove your seam allowances and you will have the width of the bicep section on your sleeve. However as dividing it into 3 can get a bit messy we will simply divide it by 4. With the bodice on the Hazel I am only grading up one size so I marked one increment.
Your pattern will start to overlap in the middle and a gap will form. This measurement is used to draft the armhole depth on the pattern. Make horizontal and vertical lines on your pattern piece placed where you want the pattern to increase or decrease.
Otherwise the pattern starts to get really distorted. For the Belcarra I am going up 3 12 sizes so I multiply my measurement from Step 1 times 35 and use that measurement when grading up. Drop the underarm point by the same amount as before and mimic the curves of the pattern piece up to the notches.
Two inches is about the max you want to increase a pattern before redrawing re-slashing and spreading again. Dont forget to mark your notches. Well you need to divide it into 3 as there are three vertical cuts.
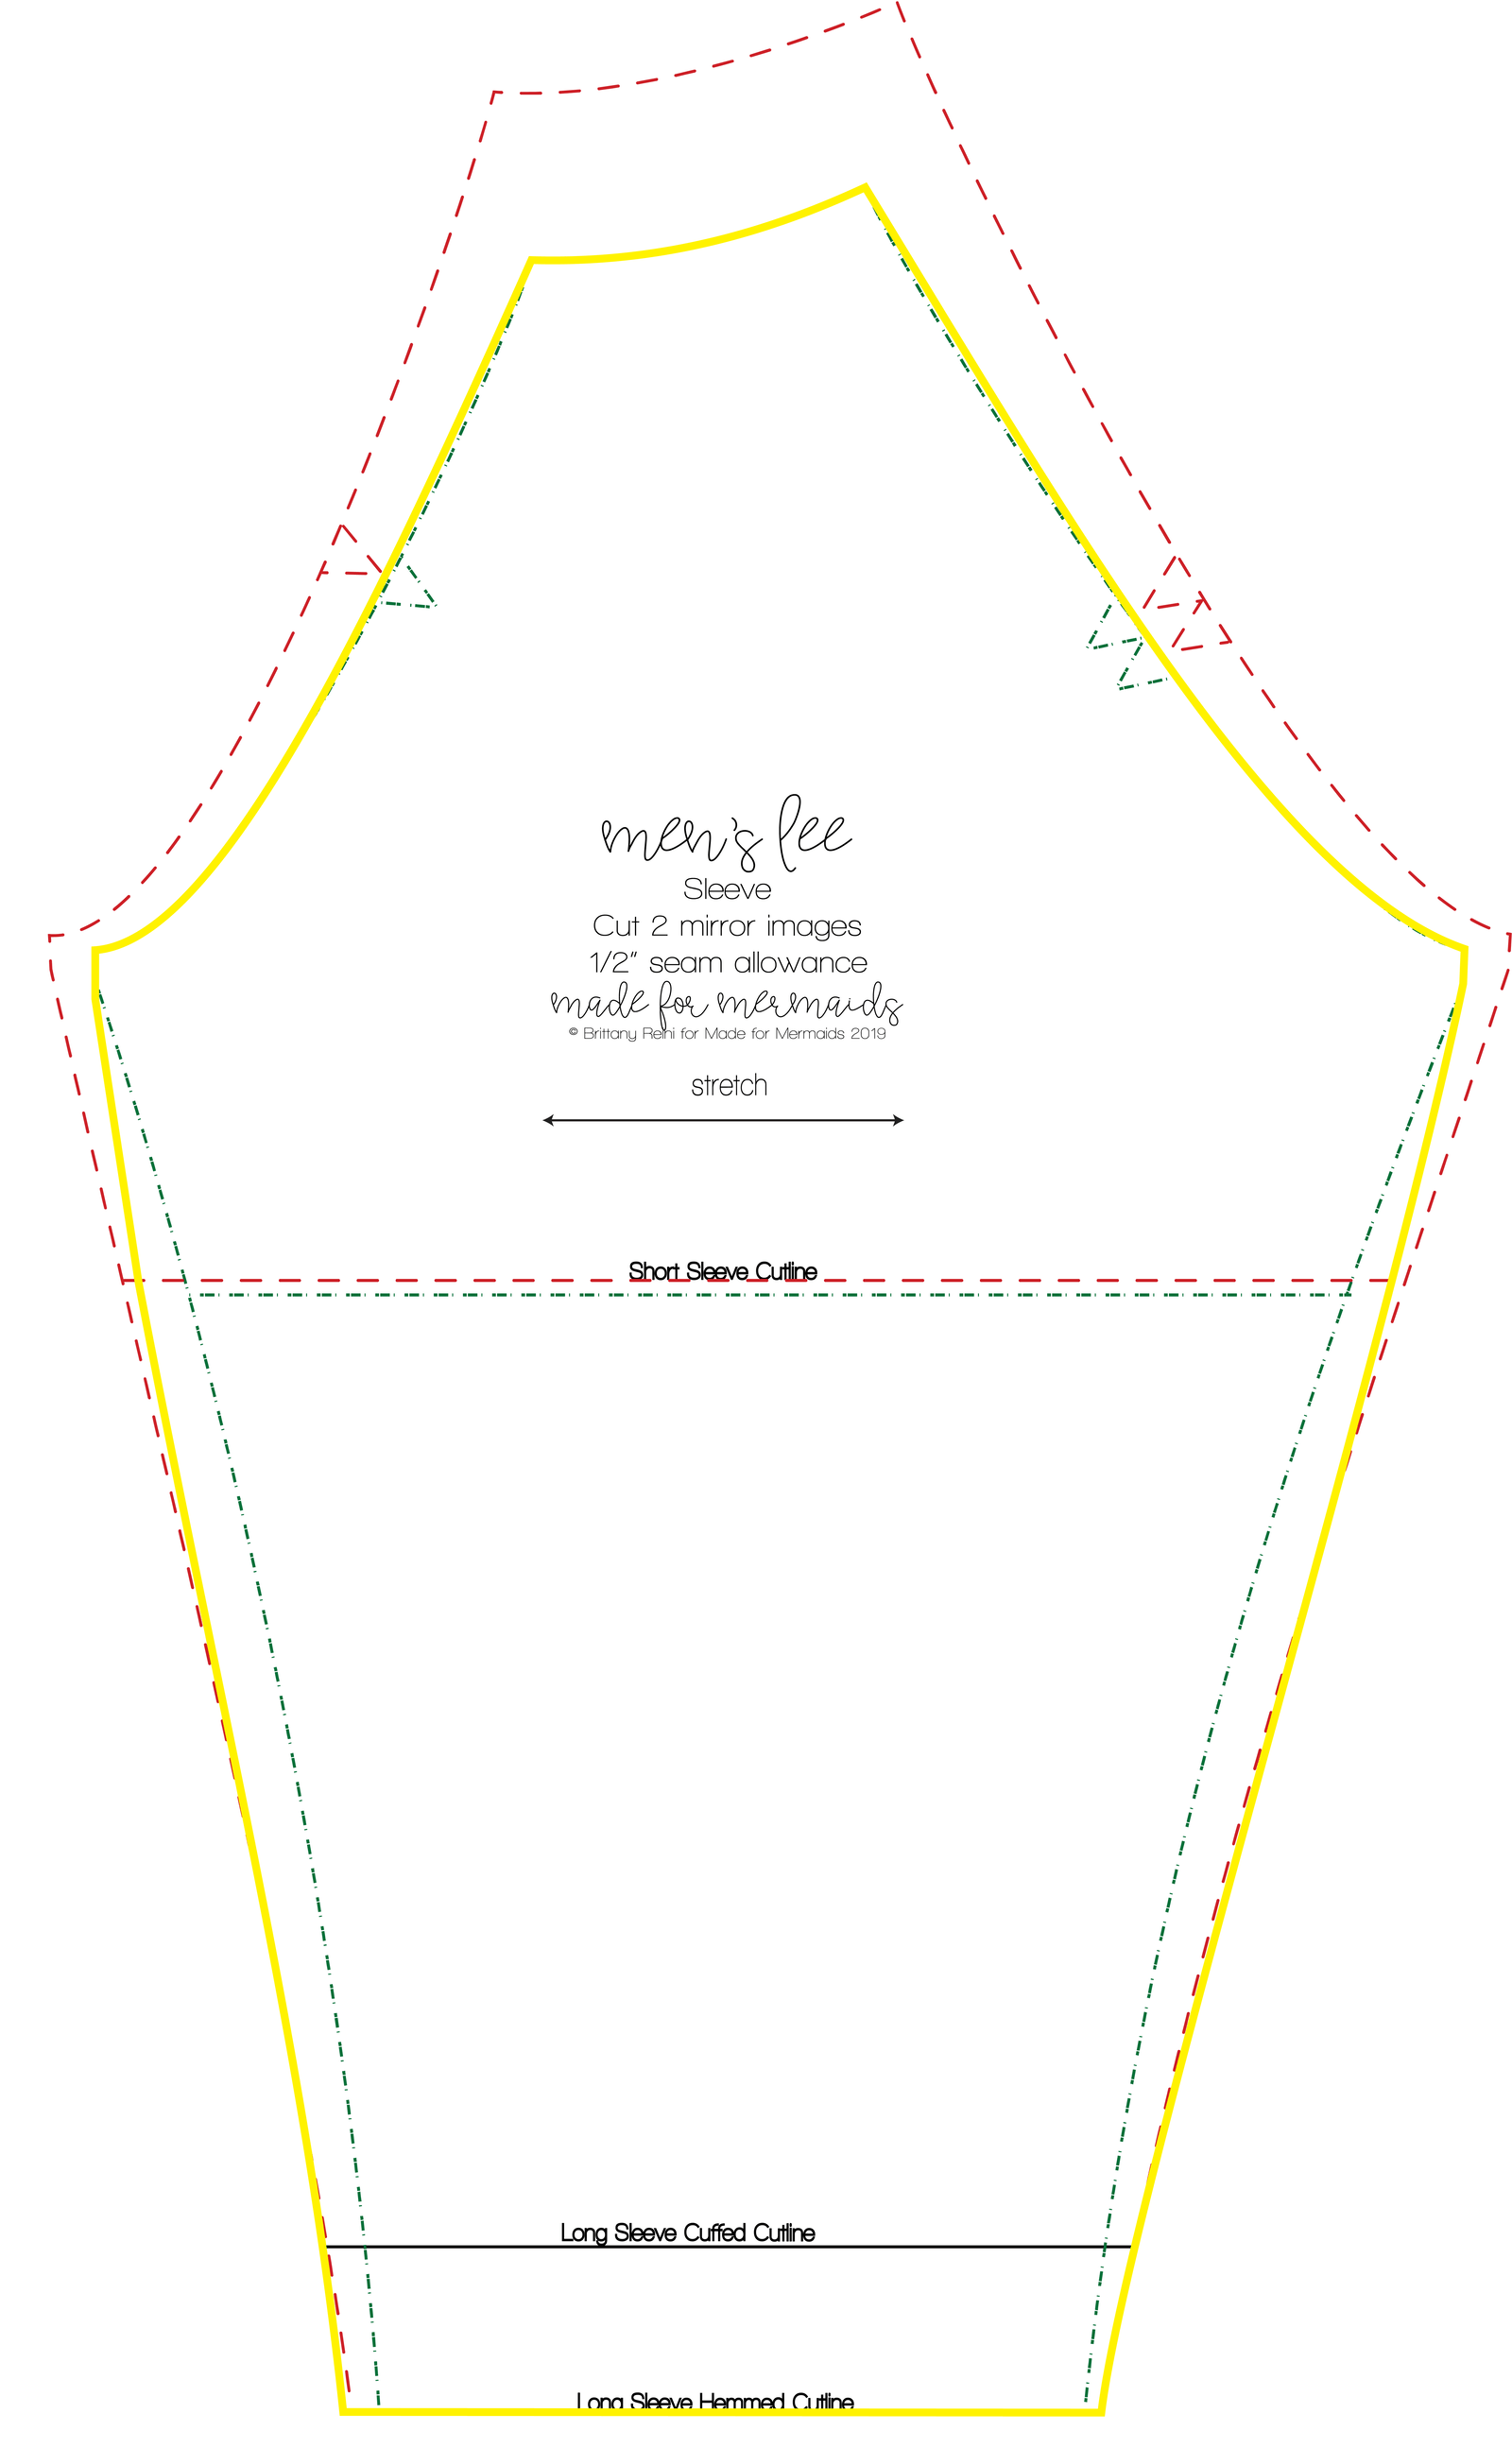
The slash and spread method is the easiest method for resizing a pattern and will be your go-to in this situation. Trace the original pattern sleeve cap onto a piece of paper. Sizes 28-42 or 42-52 Waist.
If you are sewing with jersey the pattern measurements should be the same as your arm measurement if you want to conceal the fullness on your arm. With a little know-how you can size that baby up or down as needed. Start by tracing the existing sleeve cap of your pattern piece.
Redraw the sleeve cap slightly lower follow the curve of the cap. If you are using a size between 0-16 and have an A or B cup you will need a small bust adjustment or SBA. I removed the neck trim so I could replace it to match the sleeves.
Compare these numbers to the pattern measurements. Add in your tissue insert go crazy with the tape and voila one new pattern piece. Sometimes the perfect sewing pattern is perfect in every way except the size.
Cut off the bias trim this will enlarge the arm holes by at least 1cm all around. All thats left is to cut along the new lines and proceed with cutting and sewing the fabric. Melissa from Blank Slate Patterns and Melly Sews shares a.
For neckline trim Measure the length of bias required to replace the binding removed and position in place for ties if required. Make pattern adjustments at the seam lines blending to no change at the armhole area. If you arent supplied with the number simply lay your pattern out flat and measure from about 12 inch below the arm pit point all the way across your pattern.
If the size you need is not included in the pattern all is not lost. Place your adjusted sleeve on top of the traced sleeve cap and even up the sleeve hem. One method is to measure from the shoulder and neck joint to the armpit.
The bicep on the pattern is 14 but you need to get to 15 12 adding 1 12 to the total sleeve cap length. Quick Fleece Arm Warmers Tutorial Pattern Sewing Tutorials Sewing Fleece Diy Sewing Two inches is about the max you want to increase a pattern before redrawing re-slashing and spreading again. For the major adjustment measure the armhole and the sleeve cap between the notches.
Using the pivot method to increase just the bustline area means theres no slicing the pattern up and patching it together. Take the 1 12 and divide by 2. Some companies include the bicep measurement and some dont.
Make a note of the changes you made right on the pattern piece so you dont forget what you did. How To Enlarge A Sewing Pattern Size. I prefer a method thats less damaging to the actual pattern and its a system called the pivot method.
Go back to your sleeve and add the 34 to each side of the sleeve at the bicep. If you have over 1 inch to add. Now take your ruler and measure how far you need to go out from the pattern sizes and mark it.
This gets us 18 124. Follow the steps above spreading the pieces out to add the extra width you need. Push the top of the sleeve down and the sides out.
While many pattern companies draft patterns based on a B cup both Seamwork and Colette patterns are drafted for a C cup for sizes 0-16 and a DD for sizes 18-26. Hopefully that means less chance of creating an error or having to deal with other parts of the pattern shifting. There are two vertical seams on the arm so divide the total amount you need to change the pattern by four to get the amount you need to add or subtract from each edge.
Plus size sewing patterns. If you are working in wovens you need between 2 and 5 cm 34 2 extra ease in the overarm line depending on what you are sewing youll need more width for a. You should now be adding this 18 to two of the three vertical cuts that are closest.
There are a few options for full bust adjustment. So youll spread your bodice 12 to go up one size 12 x 4 2 and then increase again 2 total from the new pattern to get to your size. Adjust the seam allowancecutting line.
You can measure your bicep with your arm bent and then measure the original sleeve pattern at the bicep to see how much you should add. Perhaps you have a paper sewing pattern whose size range is just outside of yours paper patterns come with one size range in an envelop eg 6-8-10-12-14 in one envelop and 14-16-18-20-22 in another. The sleeve cap for a set in sleeve must always have a little ease.
I also learned a technique from an English cutter I believe where one can cut the gusset pattern in half vertically and add each half to the underarm of the sleeve pattern before cutting out the sleeve--essentially adding the gusset to the sleeve as a piece eliminating one extra seam under the arm--removing a bit of the extra bulk under the arm by sewing in a separate. Fill in the new space with paper leaving excess paper at the top and bottom of the sleeve for the next steps. Theres no need to despair.
Perhaps you have a tween who is not quite big enough to wear adult sizes but too big for kids patterns. How to make sleeves larger approach 2. For a woven sleeve 15-2 38-5cm of ease should be enough.
Or maybe just 1 2 cm more 14 34.

How To Full Bicep Adjustment Increase Bicep Youtube

Pattern Grading All You Need To Know Sewing For A Living

The Bicep Adjustment Tutorial Maven Patterns

Sleeve Fitting How To Adjust Bicep Width In House Patterns

Sleeve Fitting How To Adjust Bicep Width In House Patterns
How To Adjust The Armscye Love Notions Sewing Patterns

How To Increase Arm Hole Size And Sleeve Making A Baggy Armhole Won T Really Replace A Fba As You Are Not N Sewing Design Sewing Techniques Sewing Alterations

How To Adjust The Bodice And Sleeve Pattern When Armholes Are Too Large The Daily Sew
Raglan Fitting 101
Making Your Sleeves Fit

Making Your Sleeves Fit

Sleeve Fitting How To Adjust Bicep Width In House Patterns

Sleeve Fitting How To Adjust Bicep Width In House Patterns

How To Make A Sewing Pattern Bigger Or Smaller Pattern Grading Melly Sews